Old to New: Colorful Chairs!
So I am kind of crazy and spunky with colors and things when it comes to how I like to decorate my home, and ever since I was little I've wanted to decorate my house in fun, bright colors! It is starting to come true, and I just love it!!
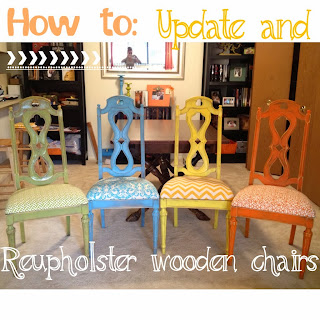

So for the last couple of years I have had a vision for what I wanted my kitchen table and chairs to look like. I wanted all of my chairs a different color and the cushions all different colors and fabrics. So when my husband and I found this table and chairs set at Goodwill for $50.00, we could not pass it up!! The chairs were exactly the design/look I've been wanting!! I was so stoked to get started on them! So off I went, hunting for fabrics and spray paint and all the other tools and things I would need to start my project!
Things you need:
1. Fabric..enough for each cushion. (I got about 2 ft. for each)
2. Foam (if you are wanting to replace the old foam)
3. Batting
4. Staple gun
5. Staples
6. Hand sander
7. Sand paper (both medium and fine grade)
8. Spray Paint (the colors you want and a clear coat finish)
9. Scotch Guard (for cushions)
10. wooden knobs and a dowel (if you are replacing any knobs on the chairs)
11. wood glue


The really cool thing that we found out was that these chairs were built back in 1927! Some of the chairs had their original tags on them still! How cool is that? :)

The first thing we did was remove the cushions from the chairs. Then I took all the staples out and removed the fabric. As you can see they had already been reupholstered once, so I had double the amount of fabric and staples to remove. Since the chairs are so old, we decided to replace the foam and batting too, so hopefully they will last a long time!


Once all the foam pieces were cut out and the batting was stretched and stapled down, it was time to put the fabrics I found (all at Hobby Lobby) on each cushion! With reupholstering, you just want to make sure that you stretch the fabric evenly around the whole cushion. You don't want to stretch it too much or your cushion will be flat, but you also don't want to NOT stretch it enough because the fabric will be too loose on the cushion.


After all the cushions were reupholstered, the next step was sanding all the chairs down. Lots and lots of sanding!


Some of the chairs were a little wobbly too, so my Mr. fix it of a hubby tightened all the chairs up with wood glue and tightening screws etc. Also one of the chairs was missing a knob, so we decided to remove all the old knobs and put new ones on! We found knobs and a dowel for really cheap at Hobby Lobby and once again, my awesome hubby put them all on for me!


Once all the knobs were on, all the chairs were tightened up and all the wood glue was dry, it was finally time to start painting them!! We found all the colors we wanted in Krylon's spray paint.


After the chairs were all sprayed and dry, I went back and sanded them all down again. I like the distress/disheveled look. So when I was sanding I made sure I sanded down the edges really well and then wherever I wanted the wood to come through the paint I would sand down more. Each chair I did a little differently, so they all are one of a kind yet still look good together! After they were sanded down to my liking, I wiped them all down and then sprayed them all with a Matte clear coat, so they all have the same type of finish. We also sprayed the cushions with a scotch guard spray, to keep them protected. I was debating on whether or not I wanted the cushions to match the chair they were on or not. But in the end I decided to have the color of the cushions match the color of chair they were on. Here is the finished product!


This was a long project and took some work, but it was so fun! I really had such a good time fixing up these old chairs! And they are exactly what I have been wanting for so many years!! Yay!! :)
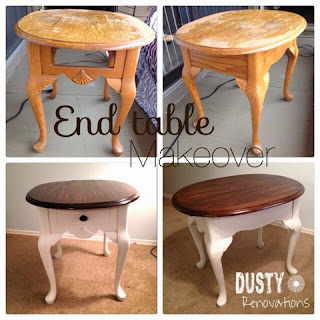
Next big project will be the table!! I'm still trying to figure out exactly what I want to do with it!


I love them! You did such a great job and I love the step-by-step pictures! Now I need to find some l chairs to update! We only have stools at our table!
ReplyDelete